How to Install a Car Stereo Easily for Beginners?
Car Stereo Installation is a popular topic among car enthusiasts and everyday drivers alike. According to a study by IHS Markit, around 40% of new vehicles are equipped with aftermarket audio systems. This rise in interest highlights the importance of understanding how to upgrade your car’s sound system.
For beginners, the idea of installing a car stereo might seem daunting. However, with the right tools and guidance, it can be a rewarding project. A survey by Crutchfield found that 50% of consumers prefer to install their stereos rather than paying for professional installation. This DIY approach not only saves money but also allows for a sense of accomplishment. Many installations don’t go perfectly on the first try, but each attempt offers valuable lessons.
Moreover, car audio technology continues to evolve, making quality clarification and user interaction vital. According to Statista, the global car audio market is projected to reach $18 billion by 2025. This booming market indicates a growing consumer interest in personalizing their in-car experience. Therefore, understanding Car Stereo Installation is essential for maximizing enjoyment and functionality in your vehicle.
Understanding Your Car Stereo System Components
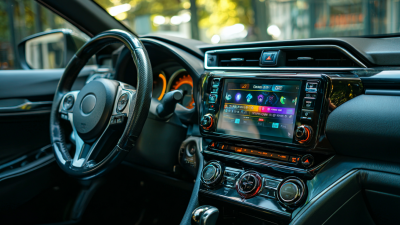
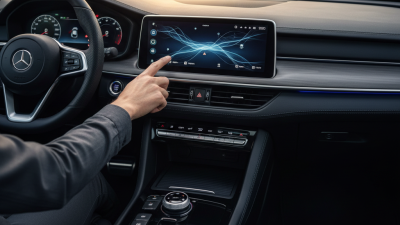
Understanding your car stereo system components is crucial for a successful installation. A typical car stereo consists of several main elements: the head unit, speakers, wiring harness, and amplifier. The head unit is the control center. It allows you to play music, adjust volume, and connect to other devices. Choosing the right head unit is important for functionality and compatibility.
Speakers are another vital component. They affect sound quality significantly. Ensuring they fit correctly in your car is essential. It's common for beginners to overlook speaker sizes or types, leading to installation challenges. Speakers can vary greatly in terms of power handling and sensitivity. So, checking specifications is a must.
Wiring is often the most confusing part for beginners. Each wire serves a unique purpose, and miswiring can cause issues. Neatly organizing wires can help prevent mistakes. An amplifier boosts sound quality and is necessary for a more powerful audio experience. Installing one can seem daunting but can greatly enhance your system. Many people face challenges with placement and power requirements. Reflecting on these components can make the installation process smoother.
Gathering Essential Tools for Installation
Gathering the essential tools for car stereo installation is crucial for a smooth process. Many beginners overlook this step, leading to unnecessary frustration. A recent industry report shows that nearly 40% of DIY enthusiasts face issues due to improper tool preparation. You need basic items like screwdrivers, wire strippers, and a socket set. Each tool serves a specific purpose, and having them at hand simplifies the installation.
Before starting, inspect your vehicle's interior. You will need trim removal tools as well. These make it easier to access your stereo unit without damaging your dashboard. Beginners often underestimate the importance of these tools, which can make or break the installation experience. Additionally, consider investing in a multimeter. This tool helps check electrical connections, ensuring everything operates correctly. According to professional installers, using quality tools can enhance your confidence and efficiency.
Next, prepare a clean workspace. Clutter can lead to lost screws or misplaced tools. Set up your workspace carefully, and keep everything organized. Despite having all the necessary tools, distractions can cause mistakes. Create a checklist for what you need. This can help mitigate errors. Remember, planning may seem tedious, but it pays off.
How to Install a Car Stereo Easily for Beginners? - Gathering Essential Tools for Installation
| Tool |
Purpose |
Quantity Needed |
| Screwdriver Set |
To unscrew existing stereo |
1 |
| Wire Strippers |
To prepare wires for connection |
1 |
| Wire Connectors |
For connecting speaker wires |
Multiple |
| Multimeter |
To check electrical connections |
1 |
| Dash Kit |
For fitting the new stereo in the dashboard |
1 |
| Wrench Set |
To secure mounting brackets |
1 |
Step-by-Step Guide to Removing the Old Car Stereo
Removing an old car stereo may seem daunting at first. Begin by gathering your tools, such as a screwdriver and a soft cloth. Make sure your car is turned off for safety. Locate the stereo’s faceplate. This may require some gentle prying. Use your cloth to protect the dashboard from scratches.
Next, remove any screws holding the stereo in place. Be careful not to drop them. Once removed, gently pull the stereo from the dashboard. You might encounter some resistance; don't force it. If it’s stuck, check for any missed screws or clips. Disconnect the wiring harness and antenna cable. Take your time with this step; you don’t want to damage anything.
It can be easy to overlook the small details during this process. Remember to keep track of all screws and components. They are crucial for the installation of your new stereo. If you find a part difficult to remove, it’s okay to pause and rethink your approach. Starting this project might feel overwhelming, but taking it step by step will lead to success.
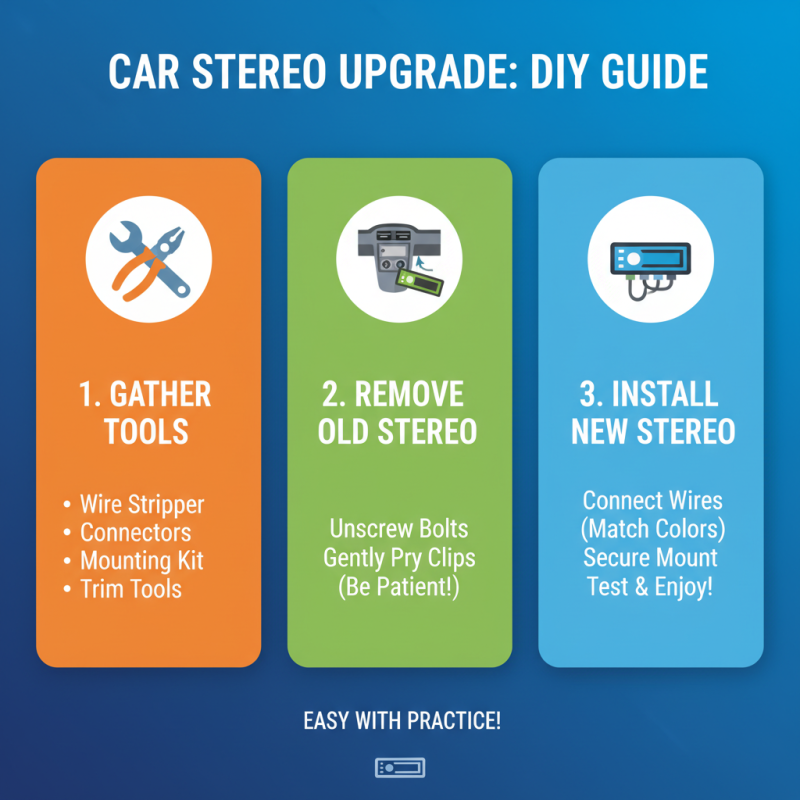
Installing the New Car Stereo: Wiring and Mounting
Installing a new car stereo may seem daunting, but it can be straightforward with practice. Begin by gathering the necessary tools. You will need a wire stripper, connectors, and possibly a mounting kit. Removing the old stereo typically involves unscrewing a few bolts or using trim tools. Be patient when dealing with clips; they can be stubborn.
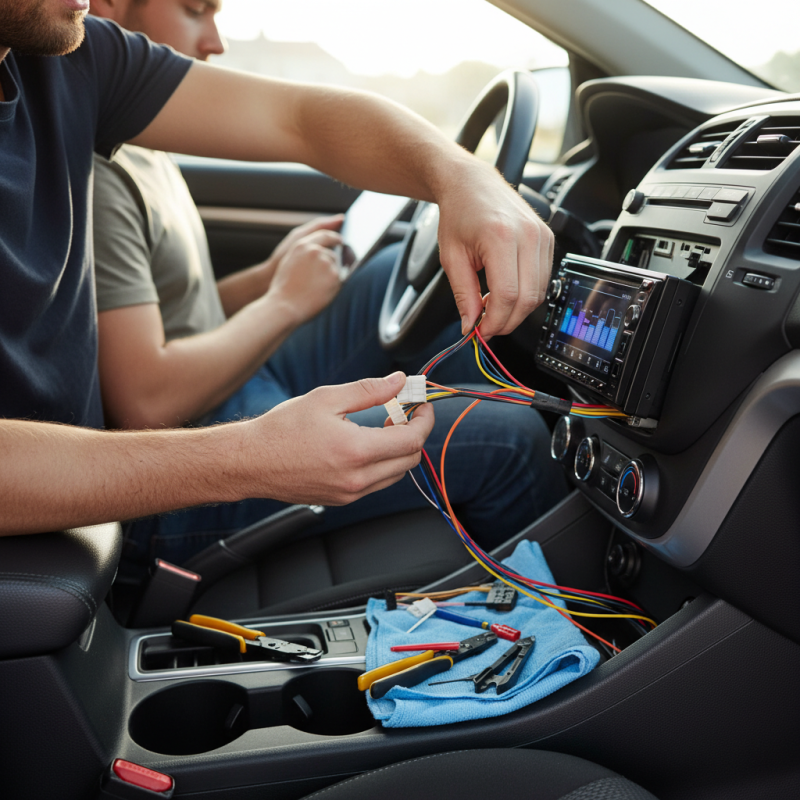
Wiring the new stereo is the most critical step. Match the new stereo’s wires to the corresponding wires in your vehicle. It’s essential to connect colors correctly. Red usually connects to red, and black to black. If wires don't match, refer to your vehicle manual. Avoid rushing this step; mistakes can lead to costly damages. Additionally, securing connections with electrical tape adds durability.
Mounting the stereo requires precision. Ensure it fits snugly into the dashboard. If it feels loose, consider using extra brackets or spacers. A wobbly stereo can be annoying during drives. Once installed, check all functions. Test the sound system before finalizing the installation to ensure everything works smoothly. A working stereo enhances the driving experience, but keep an eye on loose connections over time.
Testing Your New Car Stereo and Final Adjustments
Testing your new car stereo is an exciting step. Start by turning on your vehicle and ensuring the stereo powers up. You should hear sound right away. If nothing happens, double-check your connections. Ensure everything is secure. Loose wires can cause frustrating issues.
Once powered, test all functions. Switch between radio, Bluetooth, and auxiliary inputs. Listen for clarity in sound quality. Adjust the volume to see if it distorts at higher levels. If you notice any problems, it may be due to the speakers. Sometimes, they require proper alignment. Experimenting with the placement can make a big difference.
Check the settings. Equalizers can enhance your listening experience. Don’t hesitate to tweak these until you find what sounds best. Sometimes, the factory settings won’t fit your preferences. There’s always room for improvement. Remember, reflections from car surfaces can affect sound. Take time to adjust these details. After making changes, play a few favorite tracks. This can help you identify if more adjustments are needed. Happy listening!
Car Stereo Features Ratings
This bar chart represents the ratings of various features of car stereos based on user feedback. Each feature is rated from 1 to 10, reflecting the perceived quality and importance by users. The ratings can assist beginners in making informed decisions when selecting a car stereo.

 +86-18126757325
 CONTACT NUMBER
 CONTACT NUMBER