Leave Your Message

10 Car Stereo Installation Tips Every Buyer Should Know?

Buying a new car stereo often feels simple. Choose a screen, add speakers, and expect better sound. The difficult part begins behind the dashboard. A poor Car Stereo Installation can create rattling panels, weak bass, battery drain, or steering-wheel controls that stop responding.

Richard Clark, a respected mobile-electronics educator, has emphasized, “Installation quality determines whether the equipment performs as designed.” That principle deserves attention. The most expensive receiver cannot overcome an incorrect wiring harness or a badly sealed door speaker. Buyers should examine compatibility, power requirements, mounting depth, and vehicle-specific integration before paying for equipment or labor.

Small details matter. The installer should protect trim with plastic tools, label every connection, and test each channel before reassembling the cabin. A loose ground may produce a faint whine through the speakers. An adapter that looks unnecessary may preserve factory alerts or camera functions. Ask whether the shop provides a written warranty and explains what happens if a dashboard panel develops a rattle.

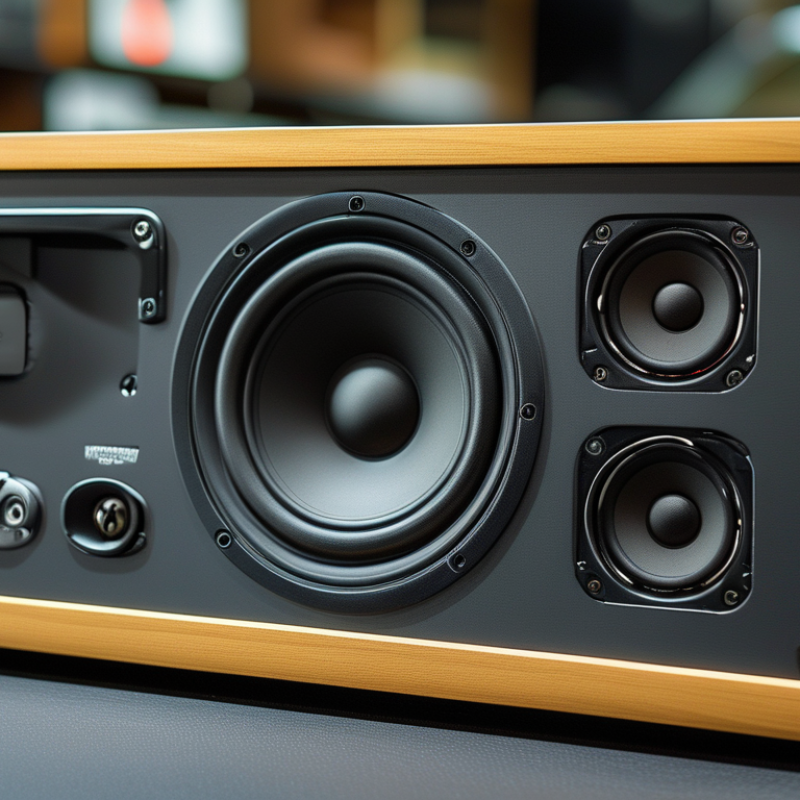
Even experienced buyers get this wrong. Bigger speakers are not automatically better. More amplifier power can also expose weak wiring or poor tuning. The “plug-and-play” promise may hide extra modules, software updates, or programming fees. A careful buyer leaves room for uncertainty and asks practical questions. Listen for clear vocals, balanced bass, and silent operation at low volume. Good installation is not dramatic. It is secure, compatible, tested, and easy to live with every day.
10 Car Stereo Installation Tips Every Buyer Should Know?

Choosing a Compatible Stereo for Your Vehicle

Choosing a compatible car stereo starts with your vehicle’s dashboard, not the screen size. Measure the opening carefully, including depth behind the trim. Some dashboards look standard but contain braces, vents, or factory modules that limit installation space. Small details matter.

Check the stereo’s power requirements, speaker impedance, and wiring connections against your vehicle manual. A compatible unit should support existing steering-wheel controls, backup cameras, parking sensors, and hands-free functions when required. You may also need a dedicated harness, antenna adapter, or mounting frame. Do not guess. A qualified installer can verify these connections using current vehicle fitment data and a wiring diagram.

I once assumed two stereos with identical dimensions would install the same way. The second unit needed more rear clearance and interfered with the ventilation duct. That mistake taught me to inspect the complete dash cavity before purchasing. Also confirm screen visibility in direct sunlight and whether physical controls remain easy to reach while driving. A reliable seller should provide return terms, technical specifications, and compatibility details for your exact vehicle year and trim. Even careful buyers miss one feature sometimes.
Checking Required Tools, Wiring, and Installation Accessories

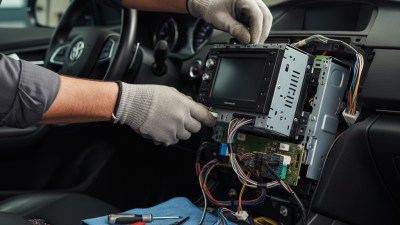
Before buying a car stereo, inspect the dashboard opening and factory wiring. A trim tool, socket set, wire stripper, crimper, multimeter, and heat-shrink tubing are practical essentials. Measure twice. Disconnect the negative battery terminal before touching power wires. This protects sensitive electronics and reduces accidental shorts. A cheap test light can help, but a multimeter gives more reliable voltage readings.

Never trust wire colors without verification. Match constant power, accessory power, ground, speaker polarity, and illumination circuits carefully. Use a vehicle-specific wiring harness, mounting kit, antenna adapter, and steering-control interface when required. Avoid twisting wires together and covering them with loose tape. Crimped connections with heat-shrink tubing withstand vibration better. Ground the stereo to clean, unpainted metal. Poor grounding often causes noise, resets, or weak audio. The 2024 SEMA Market Report valued the U.S. specialty-equipment market at 52.3 billion dollars in 2023, showing strong demand for aftermarket upgrades, but installation quality still varies widely.

Check fuse ratings before installation. Never replace a fuse with a larger one. NHTSA reported 3,308 deaths involving distracted driving in 2022, so controls should remain easy to reach and visually clear. Route cables away from pedals, airbags, and sharp metal edges. Leave enough slack behind the unit for future servicing. Expect surprises. Factory connectors may look compatible but use different pin layouts. I have seen careful installations fail because one small adapter was missing. Testing speakers, memory settings, charging, and backup-camera functions before reinstalling the trim prevents an avoidable second teardown.

10 Car Stereo Installation Tips Every Buyer Should Know? - Checking Required Tools, Wiring, and Installation Accessories

No. Installation Focus What to Check Before Buying Recommended Tool or Accessory Typical Requirement Why It Matters
1 Confirm the stereo size Measure the dashboard opening and verify whether the vehicle accepts a single-DIN or double-DIN receiver. Vehicle-specific dash kit and measuring tape Single-DIN: approximately 180 × 50 mm; double-DIN: approximately 180 × 100 mm A correct fit prevents gaps, loose mounting, and interference with dashboard controls.
2 Inspect the power wiring Identify constant power, switched accessory power, ground, illumination, and speaker circuits. Digital multimeter and wiring diagram Most passenger vehicles use a 12-volt electrical system. Testing wires instead of relying only on color codes reduces the risk of incorrect connections.
3 Use a compatible wiring harness Check connector shape, pin layout, steering-wheel controls, factory amplifier, and data-bus features. Vehicle-specific wiring harness or interface module Some vehicles require an interface to retain accessory functions. The correct harness avoids cutting factory wiring and helps preserve original vehicle functions.
4 Choose suitable wire connectors Select connectors for the wire gauge and installation environment; avoid loose twisting or bare-tape joints. Crimp connectors, heat-shrink tubing, and wire stripper Common automotive audio wire sizes are approximately 18–22 AWG for signal and speaker leads. Secure, insulated joints help prevent intermittent audio, shorts, and corrosion.
5 Check speaker compatibility Compare speaker impedance, mounting depth, diameter, and connector type with the vehicle and stereo. Speaker adapter brackets and terminal adapters Many car audio speakers use a nominal impedance of 4 ohms. Matching the load helps protect the receiver and supports consistent sound output.
6 Prepare panel-removal tools Check whether the dashboard uses clips, screws, or hidden fasteners before removing trim. Non-marring plastic trim tools and a small screwdriver set Use plastic tools around visible trim and displays. Proper tools reduce scratches, broken clips, and damage to dashboard surfaces.
7 Plan antenna and USB connections Verify the antenna plug type, USB extension length, and preferred cable-routing path. Antenna adapter, USB extension, and cable clips Allow extra cable length for routing; approximately 1–2 m is often practical. Good routing keeps cables away from pedals, sharp edges, and moving mechanisms.
8 Protect the electrical system Disconnect the negative battery terminal and confirm the replacement fuse matches the specified rating. Fuse puller, insulated tools, and replacement fuse of the same rating Never replace a fuse with one having a higher amperage rating. Basic electrical precautions help prevent short circuits and wiring damage.
9 Test before final assembly Test power, audio output, balance, fader, radio reception, USB operation, and retained vehicle functions. Test speaker or multimeter and installation checklist Test all four speaker channels when the vehicle has a standard four-speaker system. Early testing makes troubleshooting easier before the trim panels are reinstalled.
10 Secure and finish the installation Check that the stereo is firmly mounted, wires are insulated, and no cable is pinched behind the dash. Cable ties, foam tape, mounting screws, and insulation tape Leave sufficient clearance for ventilation and avoid blocking heat vents. A secure finish reduces rattles, heat buildup, connector strain, and future electrical faults.

Safety note: Vehicle wiring colors and connector layouts can vary. Always verify circuits with the vehicle documentation and a suitable meter before making connections.

Preparing the Dashboard and Removing the Factory Stereo

Before installing a new car stereo, prepare the dashboard carefully. Read the vehicle’s service manual and installation instructions. Different dashboards hide screws in surprising places. Park on a level surface, switch off the ignition, and remove the key. Disconnect the negative battery cable before touching electrical connections. Wait several minutes, especially if the dashboard contains airbag equipment. Safety comes before speed.

Use plastic trim tools, not a screwdriver wrapped in cloth. A metal edge can leave scratches or damage hidden clips. Take clear photos before removing anything. Store each screw in a labeled container. I once placed several similar screws together and wasted time guessing their locations. That mistake was avoidable. Work gently around vents, control panels, and climate switches. Pull straight when possible, because twisting can break brittle clips.

After exposing the factory stereo, inspect the wiring before unplugging it. Release locking tabs instead of pulling the wires. Keep the original mounting screws and brackets nearby. They may be needed later. Check for an adapter harness designed for the vehicle’s wiring system. Never cut wires without confirming their purpose. Before reinstalling the dashboard, connect the replacement stereo and test power, speakers, steering controls, and display functions. Leave the trim loose during testing. This is less tidy, but it prevents repeated disassembly. If a warning light appears, stop and seek qualified assistance rather than guessing.

Connecting Wires, Mounting Components, and Managing Cables

10 Car Stereo Installation Tips Every Buyer Should Know?

Connecting wires correctly matters more than having expensive equipment. Disconnect the vehicle battery before touching factory wiring. Use a wiring diagram that matches your vehicle’s year and trim. Check every connection twice. A loose ground can create buzzing, dropouts, or complete system failure. Crimp connectors firmly, then protect them with heat-shrink tubing. Avoid twisting wires together and covering them with tape alone.

Tip: Label each wire before installation. I once assumed two similar wires served the same purpose, and the speakers worked unevenly. That mistake cost extra testing time. Leave enough wire length for future repairs, but do not create large loops behind the dashboard. Route signal cables away from power cables when possible. This can reduce unwanted electrical noise.

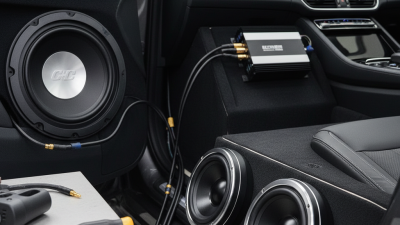
Mounting components also requires patience. Secure the receiver with the correct brackets, and check that the controls remain visible. A poorly supported unit may vibrate on rough roads. Small amplifiers need airflow, especially when installed beneath a seat. Keep them away from moisture and moving seat rails. Gather cables with reusable ties, not overly tight plastic ties. Tight bundles can damage insulation over time. Before replacing every trim panel, test sound, steering controls, display functions, and charging ports. I sometimes rush this stage, then discover a hidden loose connector later. That is frustrating. Test it while access remains easy.

Testing Sound, Controls, Safety Features, and Final Fitment

10 Car Stereo Installation Tips Every Buyer Should Know

Tip 1: Test the sound before accepting the installation.

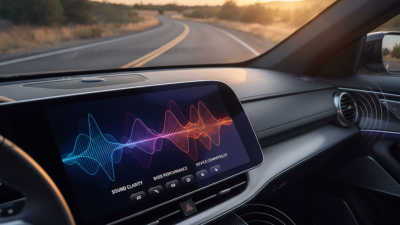
Play familiar music with clear vocals, deep bass, and quiet passages. Listen for buzzing, rattling, harsh treble, or uneven volume between speakers. A professional installer should check balance, fading, and all audio sources. Keep the engine running during testing. Electrical noise may appear only then.

Tip 2: Check every control from the driver’s seat.

Test the display, buttons, steering controls, microphone, camera, and voice functions. Make sure the screen responds quickly and remains readable in bright light. Safety features deserve careful attention. Confirm that parking visuals appear correctly and that alerts are not blocked by poor wiring or incorrect settings. Small delays matter.

Tip 3: Inspect the final fitment closely.

The stereo should sit level, with even gaps around the dashboard trim. Press gently around the panel. Nothing should creak, shift, or leave exposed edges. Cables must be secured away from pedals, sharp metal, and moving parts. Ask the installer to explain the fuse location and removal process. I have seen rushed installations pass a quick glance, then develop loose trim later. Do not rely on appearance alone. Test it twice.